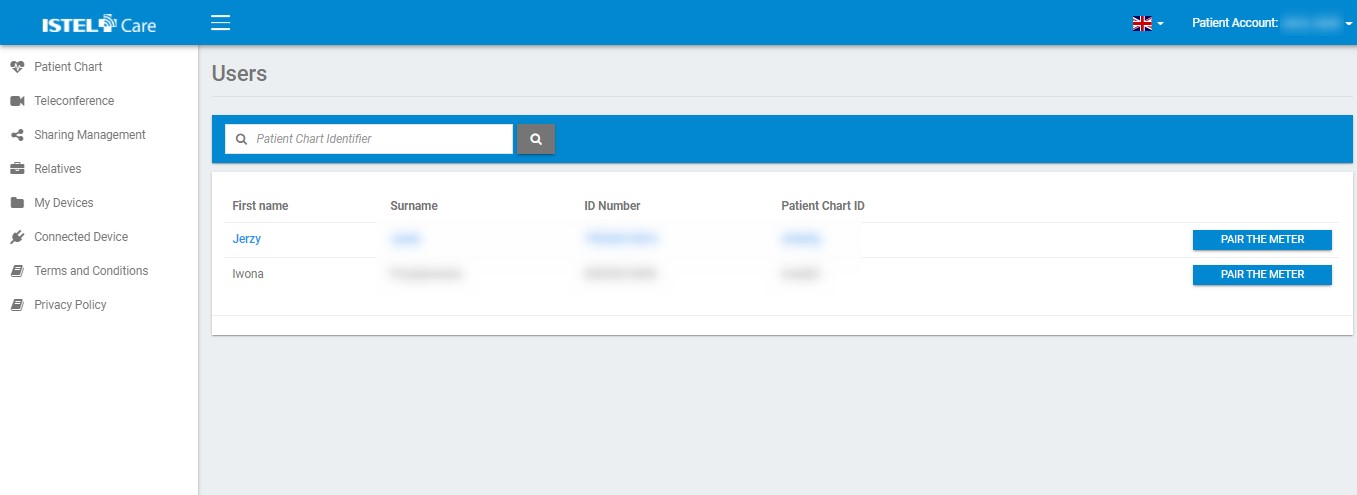
3. You will be redirected to the Users page. To find a Patient, enter the Patient’s PESEL [Personal ID No] or Chart ID No.
Fig. List of users (your Patient chart in blue colour and list of your charges charts)
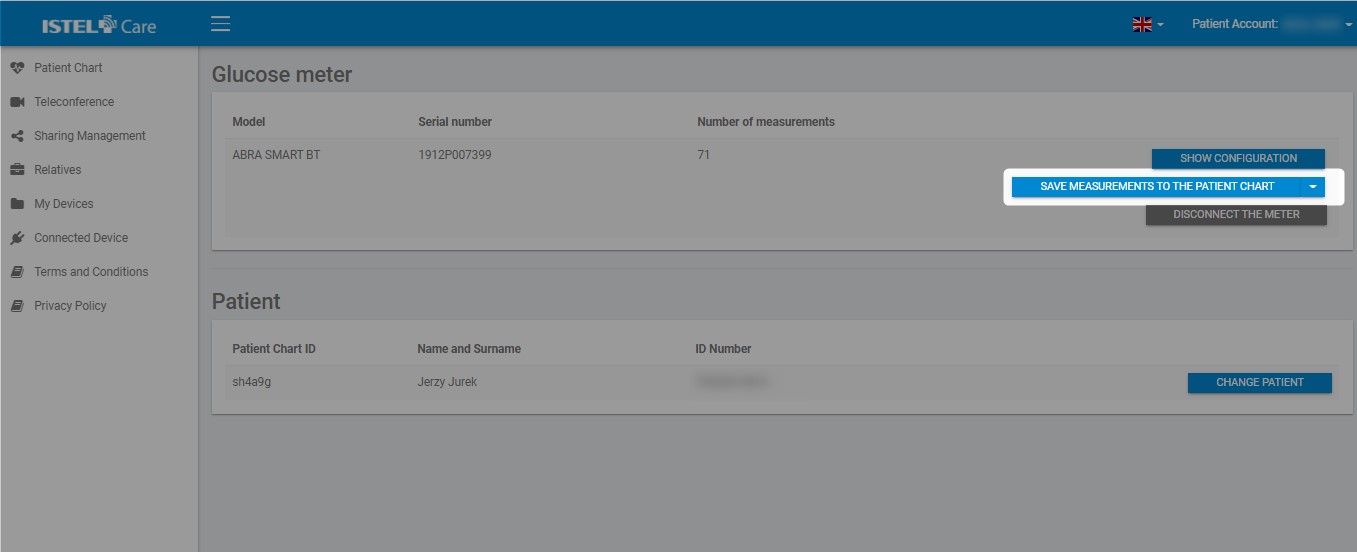
4. After the glucose meter is paired, the SAVE MEASUREMENTS TO THE Patient CHART button will appear.
Fig. SAVE MEASUREMENTS TO PATIENT CHART button
The glucose meter will remain assigned to the specific Patient Chart until it is assigned to another Patient Chart of a Charge. You can find the description of this process in section Assigning the glucose meter to another Patient Chart of a Charge Assigning the glucose meter to another Patient Chart of a Charge.